|
Have you ever found yourself wondering if there is more you can be doing with your vegetable leftovers? I know I am often disposing of the tops of vegetables and the ends that I’ve always been taught to cut off, but is there more I could be doing with these “unwanted” bits and pieces? The answer is, yes! Recently, I came across The Naturalist: Down to Earth, which is one of a series of books published in the 1970s each about different ways you can maximize your use and appreciation of the natural world. The books are wonderful and cover a variety of topics from observations you can make while going on a nature walk to creating your very own herbal vinegars. The section that immediately caught my eye was how to use your leftover groceries to enhance your gardening experience! Here are some of the creative ways The Naturalist: Down to Earth suggests you get the most out of your grocery haul. 1. Create A Green Dish Display! You can reuse the tops of beets, carrots, radishes, turnips and even pineapples to create a temporary leafy oasis! These plants wont regrow their fruits, but they will produce more greenery for a visually pleasing display. The process is easy and is a great way to get young ones involved in gardening and exploring food that is grown from the ground. To do this, you will need the top two inches of whatever plant you are choosing to regrow. Beets, carrots, radishes, turnips and pineapples are the options mentioned in the book, but I’m sure you can explore this method with other vegetables and even turn it into an experiment! Once you have the top of your plant, cut off all of the old leaf growth and put the vegetable in a shallow dish of water. Use stones or pebbles to stabilize the sprouting veggie and then you are done! You can organize the tops of your vegetables and even add seashells or sticks for added elegance. 2. Replant Your Citrus Seeds!  Lemons, Oranges, and Grapefruits won’t always produce trees with fruit, but you can replant these seeds to create your very own citrus “grove”! Before planting your seeds, it’s best to soak them in water overnight. They can be planted in loose sandy soil for best results. 3. Grow a Sweet Potato Vine!  To start your sweet potato vine, you will need:
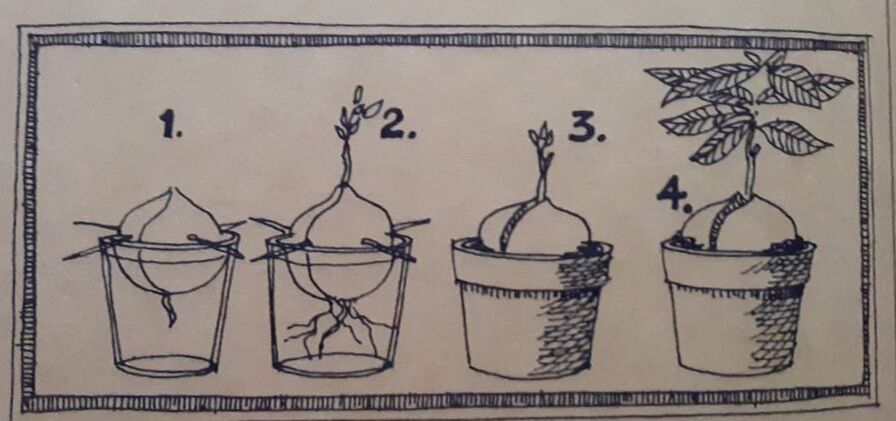
The first thing you need to do is fill your jar with water. Then, put your sweet potato in the mouth of the jar so that half the potato is in water and half of the potato is out of the water. You can use your toothpicks to secure your potato if the opening of your jar is too big.  Sweet Potato Vine from The Naturalist: Down to Earth Sweet Potato Vine from The Naturalist: Down to Earth Once your potato is secure and in place, move your jar to a dark place where it can begin to root. Check on it regularly to see if roots have started to grow and to keep the jar filled with water. In about two weeks, your potato should begin to sprout! Seeing sprouts on your potato is a sign that it should be moved into the sun. After you’ve moved your plant, you will notice that the sprouts very quickly become little vines. You can leave your potato vines in the jar of water, or move it into a pot or soil. Similarly, you can take an avocado pit and secure it in a glass of water to create an avocado plant! You will follow all of the same steps as the sweet potato vine, but it will take a little bit longer for roots and sprouts to appear, so it’s important that you practice patience.
2 Comments
3/16/2021 10:30:10 pm
Great content!! So much informative content you produce high quality of content which is good for those people can possibly visit your site. It same as Haarlem Oil and Haarlem Oil for Horses (www.horses-haarlem-oil.com/product-category/shop) made by French people in France. I love the journey of my research from this website. Hope you do more blog post here about health. Thank you and God bless.
Reply
Leave a Reply. |
AuthorNRT's dedicated staff are responsible for the content of the NatureTalk blog. Questions? For more information on any blog post, please contact us at any time. Archives
December 2021
Categories
All
|


 RSS Feed
